Images
Images
Images are commonly used to make web pages more attractive.
Images may be foreground images, which appear along with text, headings, et cetera.
Images may be background images, which are seen behind the foreground elements,
where the background color would otherwise be seen.
Browsers will also display images alone, without being a part of a web page.
Image types
Image formats commonly used in web pages:
- .gif
- Graphic Interchange Format - used for small simple graphical elements, such as an arrow.
- .jpeg or .jpg
- Joint Photographic Experts Group - used for photographs, and other shaded images.
gif images
gif images have 8 bits per pixel. Only 256 colors are allowed.
This is good for simple, solid colors.
This is NOT good for shaded images, such as photographs.
gif images are guaranteed not to loose any information in the compression process, used to
compress the images for transmission from the server to your client machine.
Images usually load from top to bottom.
It is possible to build gif images that load all the odd numbered lines first,
and then the even numbered lines.
This is the way an analog TV works.
Nobody really uses this.
It is possible to build animated gif images that change their contents in a regular cycle.
This can be rather irritating, but is often used.
It is possible to build gif images that have transparent backgrounds,
which show the background through. This can be really neat.
Unfortunately, in this course, we will not learn to build images.
We will learn to put images into our web pages.
You can search for clip art or gif images on the web.
Be sure you have permission, or can use the images under "fair use".
In this course, specify the source for each image in your web page.
In this course, only use one image from each web site.
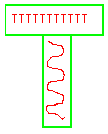
The samples show two gif images, which I use in the CIS 89C JavaScript course.
I drew these images using MS Paint.
jpeg images
jpeg images have 24 bits per pixel. 32,768 colors are provided.
This is good for photographs and shaded images.
It does loose some details in compressing the information, but still looks good.
It is NOT possible to build animated or transparent images in jpeg.
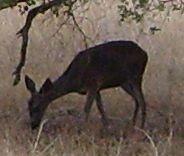
The samples show two jpeg images, which I took with my digital camera.
Foreground images
Foreground images appear as part of the page information, along with text, headings,
and other stuff.
The img element is used to specify the image.
Often web page developers like to put the images in a separate directory. If you understand UNIX directories, you may wish to do that. It is easier to upload and manage the images if they are all together. If you do not understand UNIX directories, you are not required to do this.
Required image attributes
- The src attribute is required in the img tag; without it no image can be found.
- The alt attribute is required by the standard; it is displayed when the image is not displayed, for any reason. It is required so there will be some text, that is available for sight impiared users.
- You should always use the height and width attributes. They allow the browser to know how much space to allow for the image. The browser will leave space for the images, and load the text first. The user can read the text while the browser continues loading the images. The height and width are the size in pixels, however do not type px after the size because these attributes are always in pixels.
- You will often want to use the vertical-align style property.
The tag for the image on the left is:
<img src="images/box.gif" alt="patterened box" height="17" width="15" style="vertical-align:text-bottom;" />
Image size
You can find the size of an image by loading the image in the browser; Then right click on the image and look at its properties.
You can check the size in the examples used above.
Align
-
To center an image between left and right,
you can put an image inside a p element,
and specify the style
text-align: center;for this p container element.
There are two kinds of alignment. Use only one of them - NOT both.
-
A small image can be aligned within a line of text.
This can be done with the a style, such asstyle="vertical-align:text-top;
Values for thevertical-alignproperty include:bottom middle top text-bottom text-top -
A large image can be floated on the side, with text wrapping around it.
This can be done with the style:float: left;orfloat: right;
The example pages linked on the left show this better than just discussing it.
Link to image
Usually we look at a web page in a browser.
You can also look at an image, without a web page.
We saw that in the image links early in this page.
The link is:
<a href="images/deer.jpeg"> deer </a>
Image as link

Usually the user sees a few words in blue with an underline, as a link.
The user clicks on the words and the browser goes to the new page.
You can put an image in the a container, instead of a few words.
Then the user sees the image with a blue underline or blue border, and
clicks on the image to go to the new page.
You may wish to use a larger border, so the blue color shows up.
In this example on the left, the image the user sees is a small thumbnail version of a large image.
When the user clicks on the thumbnail image, the browser shows them the large image.
The link is:
        <a href="images/deer.jpeg">
          <img src="images/deer-small.jpeg" alt="deer thumbnail"
               height="156" width="184" style="border: 10px solid;"
               />
        </a>
Image map
An image map provides hot spots within an image.
When the user clicks on a hot spot, the browser links to a new web page or image.
There are two parts of an image map: the image and the map. You must provide both.
The example shows an image with two hot spot links.
Transparent background

The image at the left has a transparent background. The yellow background shows through the transparent background. gif images can have a transparent background. An image with a transparent background can be created with an image editing program, such as MS Photo Editor or Adobe Photoshop.
1x1 images
It is often nice to use 1px by 1px images. You can give them a larger height and width. The browser will expand them to fill the height and width you specify. This is good for making solid colored rectangles, or empty transparent areas.
The images at the left are built using the images:
red1x1.gif green1x1.gif trans1x1.gif blue1x1.gif
You can copy and use these images.
The transparent image is between the green and blue images.
Background
Background images are often used, to make the page more attractive. The background appears behind the other page elements. It is good to use a light background image with dark foreground material, or a dark background image with light foreground material. You may wish to provide a background color that is similar to the predominant color of the background image. This background color will be seen if the background image does not appear.
The examples show the details for using the styles:
background-attachmentbackground-colorbackground-imagebackground-positionbackground-repeatbackground
Lab 7
Now you are ready to build your lab 7 web page.
Follow the link on the left to read the lab 7 requirements
and build your lab 7 web page.
Complete Lab 7
You have built your lab 7 web page.
Upload your page to voyager, just as you did for lab 2.
Validate your lab 7 page.
Then, log in to Canvas and submit assignment 7.
The submission should provide the following information:
- It should say that you have completed Lab 7.
Reading assignment
Read information that your find relivant from the book you selected.