User Management
Account Management Tools
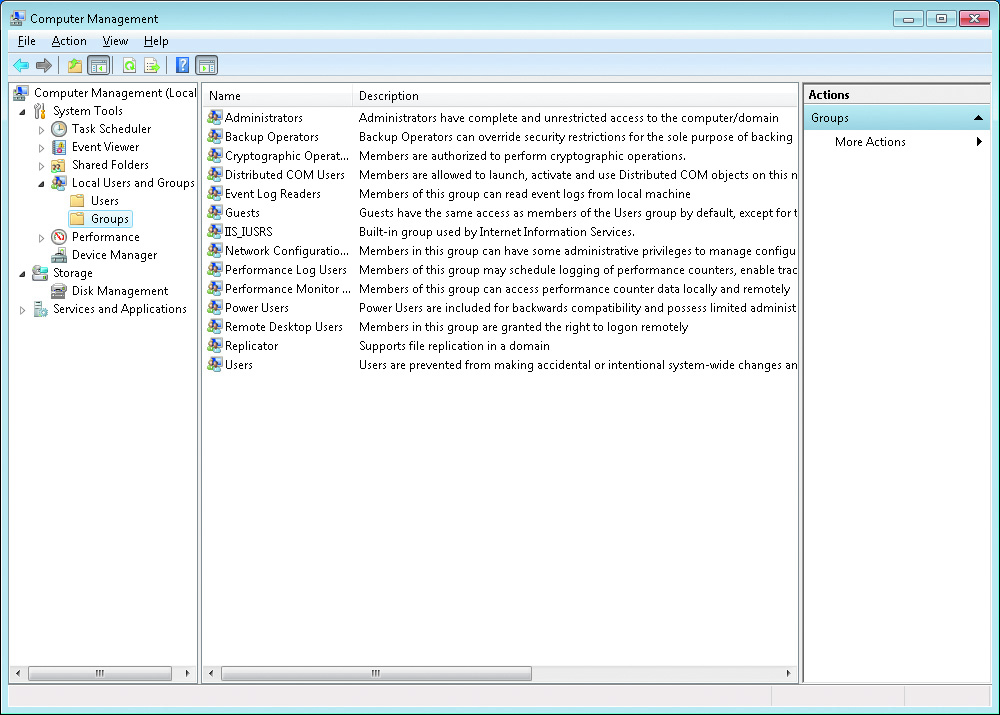
Local Users and Groups MMC Snap-In
The Local Users and Groups MMC snap-in allows you to create and manage both user accounts and groups. The fastest way to access this snap-in is through the Computer Management Administrative Tool. The Users node contains all of the users and the Groups node contains all of the groups.
Here are the two common methods for accessing the Local Users and Groups utility:
- You can load Local Users and Groups as a Microsoft Management Console (MMC) snap-in.
- You can access the Local Users and Groups tool through the Computer Management utility.
The general user tasks you can perform include:
- Create a new user:
When you create a new user, a security identifier (SID) is automatically created on the computer for the user account. The username is a property of the SID. For example, a user SID might look like this:
- Delete a user:
- Delete Files: After you select Delete Files and confirm your intention in the next window, Windows deletes the account, its user profile, and all files associated with the account, including those in its Contacts, Desktop, Documents, Downloads, Favorites, Links, Music, Pictures, Saved Games, Searches, and Videos folders.
- Keep Files: Windows copies certain parts of the user's profile-specifically, files and folders stored on the desktop and in the Documents, Favorites, Music, Pictures, and Videos folders-to a folder on your desktop, where they become part of your profile and remain under your control. The rest of the user profile, such as email messages and other data stored in the AppData folder; files stored in the Contacts, Downloads, Saved Games, and Searches folders; and settings stored in the registry will be deleted after you confirm your intention in the next window that appears.
- Disable a user:
- Rename a user:
- Set a user password:
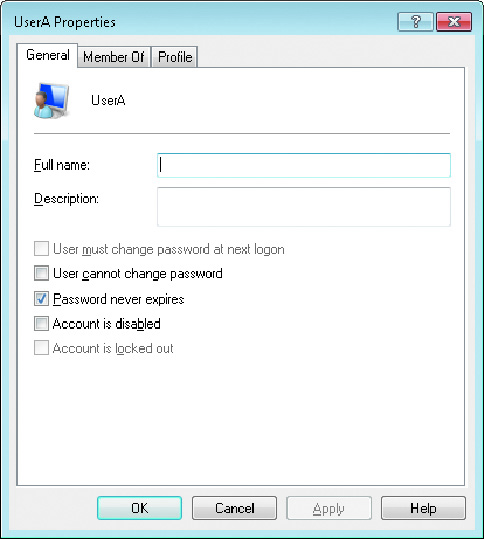
- Other user options can be configured in the properties of the user account.
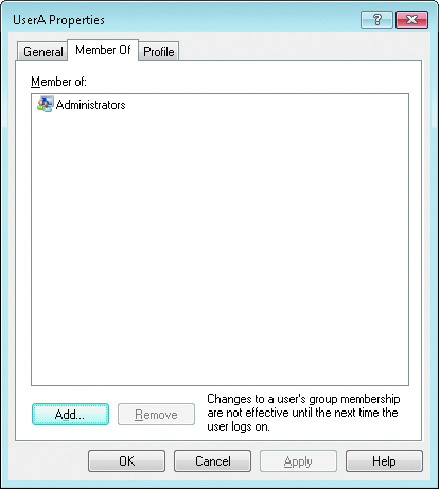
- The Member Of tab lists the groups of which the user account is a member. Any rights and permissions assigned to these groups are also given to the user account. On this tab, you can add the user to an existing group or remove that user from a group. To add a user to a group, click the Add button and select the group that the user should belong to. If you want to remove the user from a group, highlight the group and click the Remove button.
- The Profile tab is often used in corporate environments for domain-level accounts. The Profile path specifies the location of the profile for this user. By default, profiles are stored in C:\Users\%USERNAME%.
- Logon script: Logon scripts are files that run every time a user logs on to the network. They are usually batch files, but they can be any type of executable file. You might use logon scripts to set up drive mappings or to run a specific executable file each time a user logs on to the computer.
- Home folder:
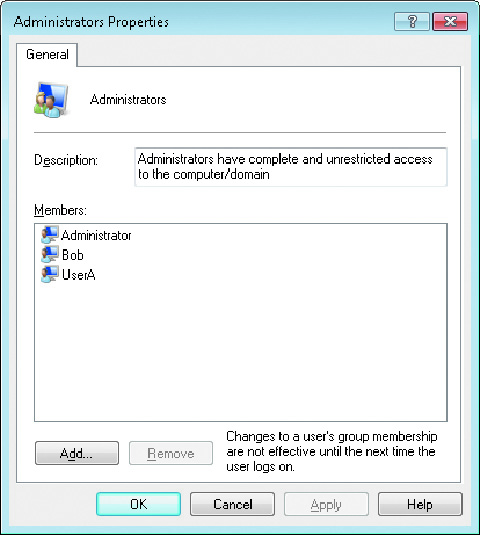
- When you view the properties of a group, there is only a single tab. This tab provides a description of the group and a list of the group members. You can add and remove users from the group here.
S-1-5-21-823518204-746137067-120266-629-500
It's apparent that using SIDs for user identification would make administration a nightmare. Fortunately, for your administrative tasks, you see and use the username instead of the SID.
SIDs have several advantages. Because Windows 7 uses the SID as the user object, you can easily rename a user while still retaining all the properties of that user. The reason is that all security settings get associated with the SID and not the user account.
SIDs also ensure that if you delete and re-create a user account with the same username, the new user account will not have any of the properties of the old account because it is based on a new, unique SID. Every time you create a new user, a unique SID gets associated. Even if the username is the same as a previously deleted account, the system still sees the username as a new user.
Because every user account gets a unique SID number, it is a good practice to disable accounts for users who leave the company instead of deleting the accounts. If you ever need to access the disabled account again, you can do so.
| Option | Description |
|---|---|
| User Name | Defines the username for the new account. Choose a name that is consistent with your naming convention. This is the only required field. Usernames are not case sensitive. |
| Full Name | Allows you to provide more detailed name information. This is typically the user's first and last names. By default, this field contains the same name as the User Name field. |
| Description | Typically used to specify a title and/or location for the account, but it can be used to provide any additional information about the user. |
| Password | Assigns the initial password for the user. For security purposes, avoid using readily available information about the user. Passwords are case sensitive. |
| Confirm Password | Confirms that you typed the password the same way two times to verify that you entered the password correctly. |
| User Must Change Password At Next Logon | If enabled, forces the user to change the password the first time they log on. This is done to increase security. By default, this option is selected. |
| User Cannot Change Password | If enabled, prevents a user from changing the password. It is useful for accounts such as Guest that are shared by more than one user. By default, this option is not selected. |
| Password Never Expires | If enabled, specifies that the password will never expire, even if a password policy has been specified. For example, you might enable this option if this is a service account and you do not want the administrative overhead of managing password changes. By default, this option is not selected. |
| Account Is Disabled | If enabled, specifies that this account cannot be used for logon purposes. For example, you might select this option for template accounts or if an account is not currently being used. It helps keep inactive accounts from posing security threats. By default, this option is not selected. |
You can delete any account except one that is currently logged on. To delete a user, open the Local Users and Groups utility, highlight the user account you want to delete, and click Action to bring up the menu. Then select Delete. You can also delete an account by clicking the account and pressing the Delete key on the keyboard.
User Accounts gives you a choice about what to do with the account's files:
When a user account is no longer needed, the account should be disabled or deleted. After you've disabled an account, you can later enable it again to restore it with all of its associated user properties. An account that is deleted, however, can never be recovered.
After you have created an account, you can rename the account at any time. Renaming a user account allows the user to retain all the associated user properties of the previous username.
When you reset a user password instead of letting a user change his/her own password, the user's access to encrypted files is lost. A password reset disk is the preferred method to reset a forgotten password. This is not a concern for domain user accounts, as the EFS certificates for domain user accounts are managed differently.
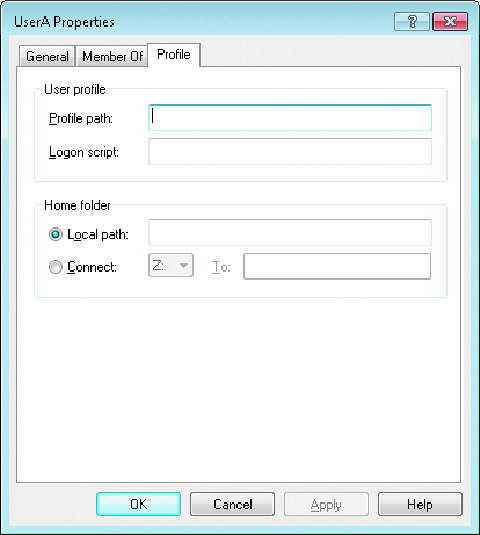
To run a logon script for a user, enter the script name in the Logon Script text box on the Profile tab of the user's Properties dialog box.
Users usually store their personal files and information in a private folder called a home folder. In the Profile tab of the user's Properties dialog box, you can specify the location of a home folder as a local folder or a network folder.
To specify a local path folder, choose the Local Path option and type the path in the text box next to that option. To specify a network path for a folder, choose the Connect option and specify a network path using a Universal Naming Convention (UNC) path. A UNC consists of the computer name and the share that has been created on the computer.
For more control over user accounts, you can configure user properties. Through the user's Properties dialog box, you can change the original password options, add the users to existing groups, and specify user profile information.