User Productivity Tools
Printing
Printer Management
- The Print Management snap-in allows you to manage the printers for your entire network from a single workstation.
- Print Management (root) node Adds or removes print servers to/from the console
and launches the Printer Migration Wizard to export or import printer configurations.
- Custom Filters node Displays all custom filters, including four default filters:
- All Printers Displays all printers on all print servers and allows administrators to open the printer queue for a selected printer, pause or resume printing, print a test page from a printer, configure printer properties, and deploy a printer connection using Group Policy.
- All Drivers Displays all printer drivers for all printers and allows administrators to view driver properties and remove driver packages from the driver store.
- Printers Not Ready Displays all print queues that are in a Not Ready state for any reason.
- Printers With Jobs Displays all print queues that currently have jobs pending in them.
When you create a new custom filter using the New Printer Filter Wizard, you can configure an e-mail notification for troubleshooting purposes to alert administrators when a printer matches the filter conditions. You can also configure a script action so that a specified script can be run when a printer matches the condition-for example, a script to restart the Print Spooler service on a print server.
In addition, the Show Extended View option (available by right-clicking a custom filter) displays jobs pending on the print queue and-if supported by the print device-the Web page from which the printer can be managed.
- Print Servers node Displays all print servers being managed by Print Management, together with a manageable view of their drivers, forms, ports, and print queues. You can also use this node to export/import print queues and printer drivers, configure e-mail notifications or script actions during times when the spooler or server is down, and launch the Network Printer Installation Wizard to add new printers manually or automatically search for TCP/IP and WSD printers and add them to the list of printers being managed by Print Management.
- Deployed Printers node Displays printer connections that have been deployed using Group Policy.
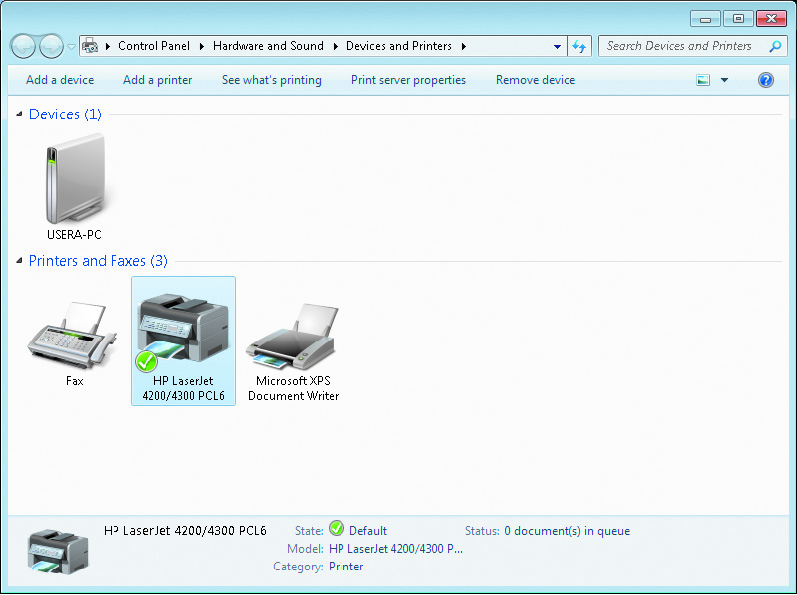
- The Printer applet is used to manage the printers on a local workstation. The applet is not capable of installing printers on remote computers.
- Some of the tasks that can be performed in the Printers applet include:
- Add a printer
- See what's printing
- Set as default
- Select printing preferences
- Configure printer properties
- Configure printer server properties
- Remove device
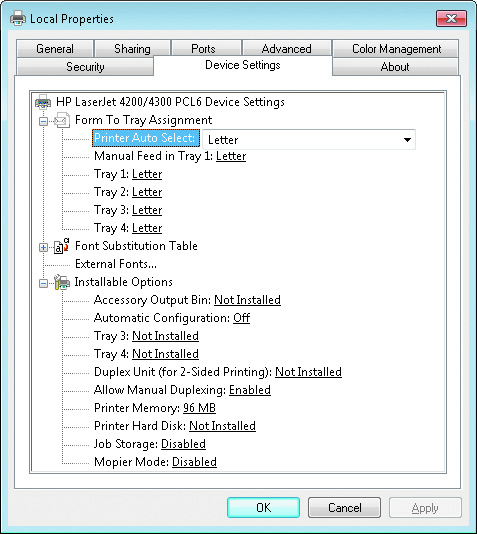
- Each printer you install in Windows 7 can be configured independently. Most of the options available for configuration are standardized by Windows 7.
- The configuration options in the Device Settings tab are:
- Printer sharing is enabled and controlled on the Sharing tab.
- Enable sharing for the printer
- Define the share name for the printer
- Specify whether print jobs are rendered on the client computer or print server
- Add drivers for other operating systems to download by using point and print
- In the main Control Panel window, under Network and Internet, click the Choose Homegroup and Sharing Options link.
- The HomeGroup screen appears. Under Share Libraries and Printers, click the Printers check box to select it.
- Press the Save Changes button.
- Log in to a computer in the homegroup from which you want to be able to print.
- In the main Control Panel window, under Network and Internet, click the Choose Homegroup and Sharing Options link.
- The HomeGroup screen appears. Press Install Printer.
- If you don't already have the appropriate printer drivers installed on this computer, click Install Driver in the dialog box that appears. Windows 7 confi gures the computer to print via the network.
- Press the Start button ( ) and choose Control Panel to open the Control Panel window.
- Under Network and Internet, click the View Network Status and Tasks link
- On the left side of the Network and Sharing Center, click the Change Advanced Sharing Settings link.
- The Advanced Sharing Settings screen opens. If necessary, click the down arrow to the right of your current profi le to expand it.
- Under File and Printer Sharing, click the Turn On File and Printer Sharing radio button to select it.
- The default sharing permissions for printing are:
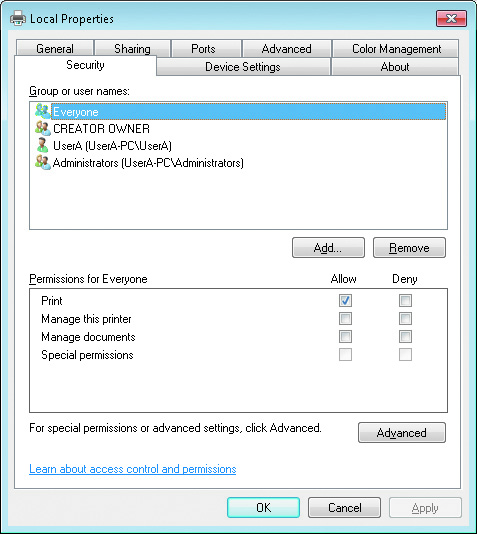
- Everyone
- CREATOR OWNER
- Local Administrator User (Userx)
- Administrators
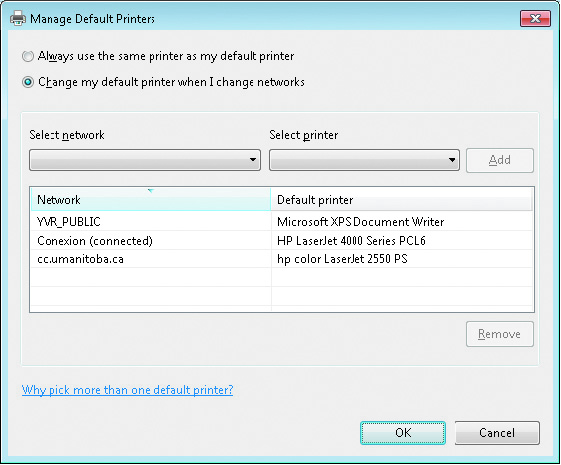
- The location aware printing feature in Windows 7 is:
- For each print job, you can perform the following tasks:
- Pause
- Resume
- Restart
- Cancel
- Edit job properties
- Some of the situations where you might want to manage print jobs are:
- Restarting a print job when there has been a paper jam
- Pausing a large print job
- Raising the priority of a print job
- Changing the schedule of a large print job
- Canceling a corrupted print job
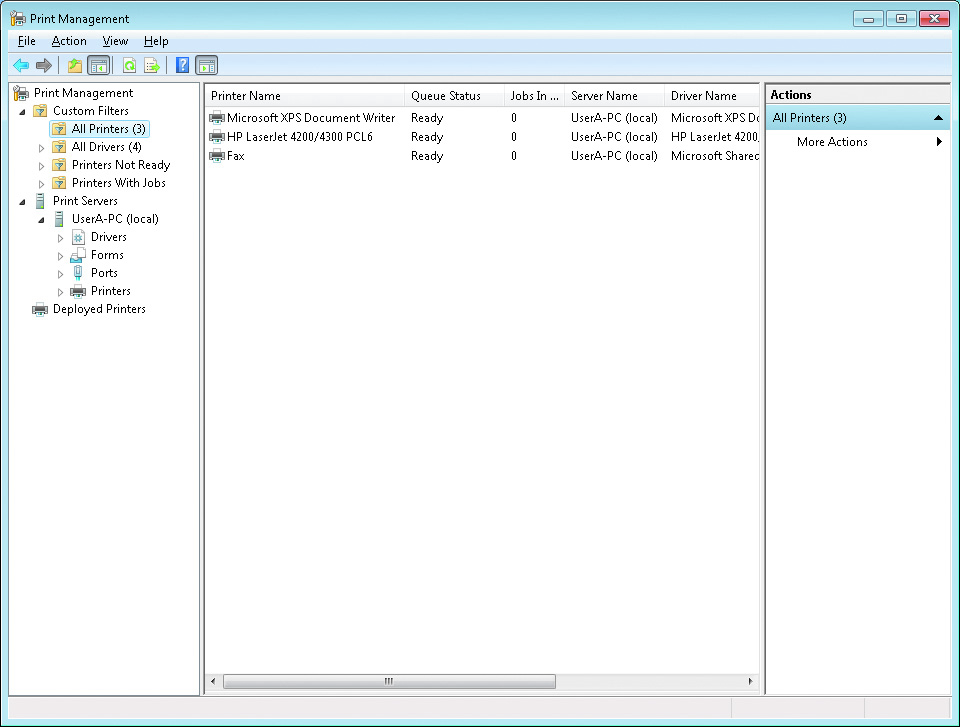
Print Management displays a root node and three main subnodes
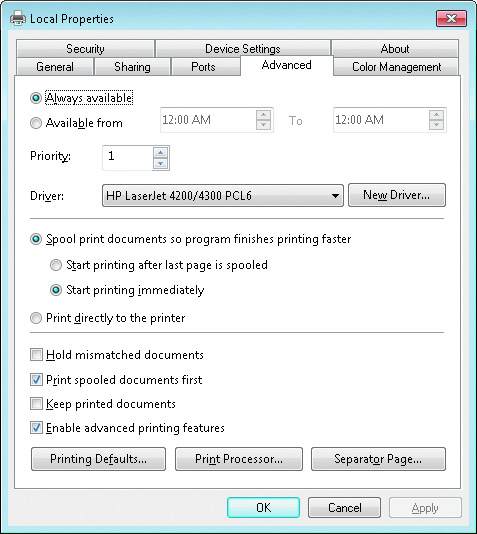
The Advanced tab has a number of options that are typically only implemented for server-based printing.
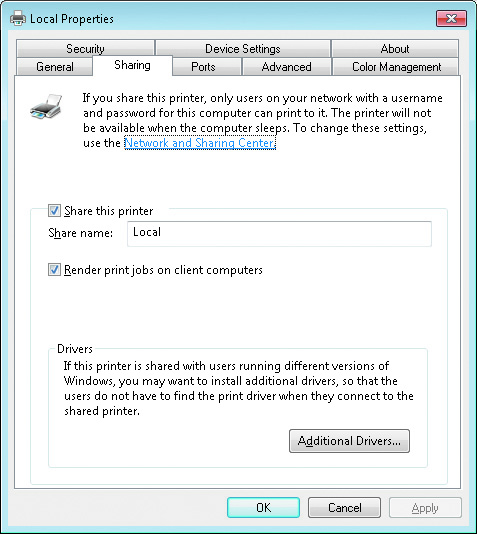
The Sharing tab allows you to:
To share a printer with a homegroup, first connect it to your Windows 7 PC.
Next, set up each computer on the homegroup to print from that printer.
To share a printer with a workgroup rather than a homegroup, first connect it to your Windows 7 computer.